UK NEWS – Glass fiber, a versatile and durable material, is ubiquitous in our daily lives. From boats and cars to insulation and surfboards, glass fiber products are everywhere. However, even the most resilient materials can sustain damage. This is where glass fiber repair kits come into play, offering a convenient and effective solution for restoring damaged glass fiber components.
Understanding Glass Fiber Repair Kits
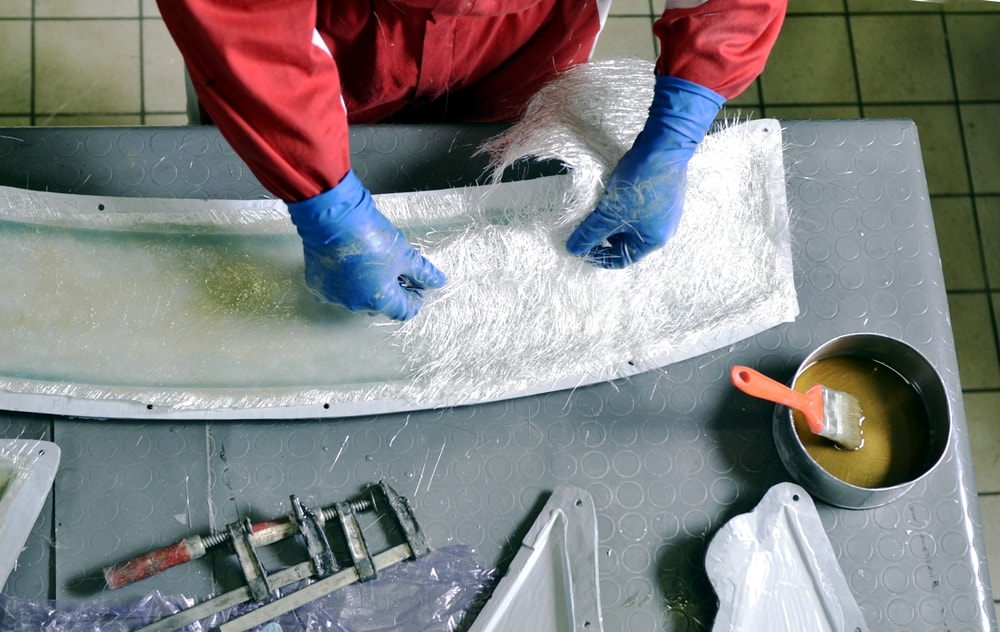
A glass fiber repair kit typically contains a range of essential components, including:
- Resin: The adhesive that binds the glass fiber strands together. Resins come in various types, such as polyester, epoxy, and vinylester, each with its own unique properties and curing times.
- Hardener: A catalyst that activates the resin, causing it to solidify.
- Glass Fiber Mat or Cloth: A woven material made of thin glass fibers, used to reinforce the repaired area.
- Sandpaper: For preparing the damaged surface by removing any loose or damaged material.
- Primer: A coating applied to the damaged area to improve adhesion between the resin and the substrate.
- Mixing Sticks and Containers: For accurately measuring and mixing the resin and hardener.
- Gloves and Protective Gear: To protect your hands and skin from the chemicals in the kit.
The Repair Process: A Step-by-Step Guide
- Preparation: Clean the damaged area thoroughly to remove dirt, grease, and any loose particles. Sand the area to create a rough surface for the resin to adhere to.
- Mixing: Follow the instructions provided in the kit to accurately measure and mix the resin and hardener. Ensure that the mixture is thoroughly blended to achieve optimal curing properties.
- Application: Apply a thin layer of primer to the damaged area to enhance adhesion. Once the primer is dry, apply the resin mixture using a brush or roller.
- Reinforcement: Place the glass fiber mat or cloth over the resin-coated area and gently press it into the mixture. Apply additional layers of resin and reinforcement as needed to achieve the desired thickness and strength.
- Curing: Allow the repaired area to cure according to the manufacturer’s instructions. This process may involve placing the item in a warm, dry environment to accelerate curing.
Choosing the Right Repair Kit
When selecting a glass fiber repair kit, consider the following factors:
- Type of Damage: Different kits are designed for specific types of damage, such as cracks, holes, or delamination.
- Material Compatibility: Ensure that the kit is compatible with the type of glass fiber material being repaired.
- Resin Type: Choose a resin that is suitable for the intended application and curing conditions.
- Kit Contents: Verify that the kit includes all the necessary components for a successful repair.
Safety Precautions
- Ventilation: Work in a well-ventilated area to avoid exposure to harmful fumes.
- Protective Gear: Wear gloves, eye protection, and respiratory protection as recommended by the manufacturer.
- Storage: Store the kit in a cool, dry place, away from direct sunlight.
Beyond Repair: Prevention and Maintenance
While glass fiber repair kits offer a convenient solution for fixing damaged components, prevention is often the best course of action. Proper maintenance and regular inspections can help identify and address potential issues before they escalate into costly repairs.
By understanding the basics of glass fiber repair kits and following the recommended procedures, you can effectively restore damaged glass fiber components and extend their lifespan. Whether you’re a DIY enthusiast or a professional, a glass fiber repair kit is a valuable tool for maintaining the integrity and functionality of your glass fiber products.